
Rock Breaking for the Trail Builder

Have you ever been making great progress on a trail project, then have it come to a screeching halt due to a boulder or hidden rock outcropping? In this article, we will go over some ways to remove this type of obstacle, with and without explosives.
Rock Breaking Basics
Before we get into the nuts and bolts of rock breaking, we should go over the basic ideas and terminology. To begin with, rock is generally a very strong material in compression. We walk on it all day, we build buildings on top of it, and it can withstand many thousands of pounds per square inch pressing down on it. If you’ve ever taken a sledgehammer or digging bar to a large exposed rock, you probably found that a lot of effort was needed to make a little progress.
The good news is that under tension, rock is much weaker. This is the principle we are going to take advantage of later. The basic recipe for rock breaking involves getting access to the inside of the material and applying forces to pull it apart. We will discuss how to get access (usually by drilling holes) and then various ways of applying force (feathers and wedges, expanding grout, explosives).

A Word About Safety
All of the techniques we will be discussing can be dangerous. Any time we drill or hammer on solid rock, we generate flying rock chips. The tools we use are made of very hard steels that can spall and make steel splinters. Eye protection is 100% mandatory, and appropriate work gloves are recommended.
The dust produced from drilling and jack-hammering should also be assumed to contain silica, especially anything with quartz content, including common sandstone. Silica dust causes devastating illnesses, such as lung cancer and silicosis. An N95 or P100 mask with a good seal should always be worn when drilling rock, and the work should be wet down with water whenever possible.
When you break and/or move large pieces of rock, you are also dealing with stored energy. Wear a hard hat anywhere rock can come down on you. Assume that anything that could fall or roll on you eventually will, and keep body parts out of its path. Nobody wants to hear about how you became the one-legged crew boss.
Finally, drilling and hammering generate a lot of noise. Use common sense and wear ear protection whenever you operate loud machinery.


Rock Drilling Basics
The first step to separating ore from the host rock is getting behind it by drilling. The classic method is to use muscle power and a chisel-shaped drill steel and a 4lb hammer called a “single jack.” The basic idea is to hit the steel to smash some rock, turn it, and repeat this action over and over. Double jacking is the same thing, except done with an 8lb “double jack” sledgehammer and a two-person team.
The percussion of steel hitting the rock fragments it and drives the drill deeper. Turning the drill steel moves the chips out of the way and positions it on fresh rock for the next strike. All rock drilling is 95% hitting and 5% turning.
Modern hammer drills (electric, gas, or pneumatic) do the exact same thing, just much faster. They all use a combination of “whacking and turning” to drive the drill bit into the rock. Most modern drills also include some way of removing the cuttings, either with air/water flushing or with spiral flutes on the drill bits.

How to Drill
All drilling works basically the same. First, you want to scrape off any dirt or soft material. Rock drills do not go through this well. Next, you will want to start off with your shortest drill bit to “collar” or get the hole started. Short drills are stiff and make starting easier. Once you have drilled as deep as you can, you then switch to a longer drill. This continues until the desired depth is reached. Switching steels helps keep the drills from overheating, keeps the hole going straight, and makes it easier to operate in tight spaces.
Drill Bits
Drill bits are available in different configurations to make drilling hard or soft rock easier. Larger drills powered by air or gasoline take “steels” with a replaceable carbide “bit” attached to the end. Smaller drills (SDS and SDS Max electrics) use a disposable, one-piece bit. Drill bits are a “wear item” and must be changed when dull. Only quality carbide-tipped drills should be purchased.
The smaller drills used in cordless and electric hammer drills can usually be used in sequence to ream out a hole to a larger diameter. Most air drills use bits with a flat face that must NOT be used in this way, unless they are specialized “reaming” bits.


Types of Drills
As a hand crew who may or may not have vehicle access, you have a choice of traditional hand drilling with a single jack, cordless hammer drills, generator-powered electric drills, gasoline drills, and the “big guns,” pneumatic drills that are powered by a towable air compressor.
Cordless Drilling
With Lithium batteries now standard, cordless hammer drills have become much more useful for pack-in projects. An 18-20V model from Milwaukee, Hilt, etc., with 3-5AH batteries can drill several deep 1/2” or 5/8” holes on one battery. The larger models can drill 1” holes in one pass. Cordless drills are an excellent, portable way to make holes for micro-blasting (more on this later) or inserting a feather & wedge set for splitting.
If you are looking to get a cordless hammer drill, get one that takes SDS+ bits (the most common) and is rated for 1” or larger holes. If you will be making 1” or larger holes regularly, get one of the new SDS Max units. Holes over 1” are necessary for rock breaking with expanding demolition grout.
Also, buy the largest battery packs available and a “fast” charger. The bigger packs will drill more holes per charge and are less likely to overheat and shut down.
Electric Hammer Drills
The next step up in drilling machinery is the 110V or 220V electric hammer drill. These take SDS+, SDS Max, or larger spline-shank tools. These are large, professional-use tools that must be run from a generator and extension cord. They are expensive and big enough to hurt you.
Most of them can drill 1” or larger holes without too much trouble and can also serve as a jack-hammer. They also have a variety of other tools available, such as moil points for chiseling, spades for digging hard dirt, and grounding rod drivers. These tools are an excellent choice for drilling holes for expanding grout or for hammering out already broken rock.
Holes up to 1 ½” in diameter and 36” deep can be made with these. Most will run on a small 2KW “Predator” or EU2000 type generator that can be packed in.
About Gas-Powered Tools
Another, often overlooked category of portable machines is gas-powered drills and breakers. There are 3 basic formats for gas drills. This includes fence post augers, small Chinese-made gas drills, and large, professional units such as the Pionjar and Cobra Combi.
Augers: Great for Dirt, not rock
Gas-powered augers are available to buy or rent. They are excellent if you need to set fence posts in soil. These are easily rented at any tool shop. Keep in mind that these have no percussion action and will not work at all on even soft rock.
Pionjar – That’s Swedish for Pioneer
Perhaps the coolest all-purpose machine for off-grid trail work is the Swedish-made “Pionjar” and “Cobra Combi” series of drills sold in the US by Atlas Copco. This is a 55lb combination drill/jack-hammer that comes in a crate. It has a 185cc 2-cycle engine, and it’s a beast. You can drill up to 2” holes through solid rock at about 1 foot per minute, and they accept industry-standard drill steels used in mining. They were used extensively by the NPS and also double as a powerful jack-hammer. They can be packed on a forestry pack frame.
The only drawback to these is cost. The updated model (called the “Cobra Combi”) sells for about $5,500 new. They are well-made and can be rebuilt (we do this as a sideline). This type of drill is an excellent choice if you want to drill lots of 1-2” diameter holes for blasting or heavy-duty breaking with expanding grout.
Pneumatic Drills: The Big Guns!
If you have a large number of holes to drill, nothing beats renting a pneumatic drill and compressor.
Air drills up to about 30lbs can be used either as a “sinker” drill to put vertical holes in rock or muscled into drillinghorizontally. The 55lb sinker drill is commonly used if weight is not a consideration and holes are vertical.
If you decide to rent a drill, be aware that even a very small one uses a LOT of air. Expect also to rent a 185cfm towed compressor. You’ll also need to rent enough ½” or 3/4” air hose and a selection of steel. Make sure the air hoses come with safety pins, so that the sections cannot come loose and hurt you. An oiler should also be included, as many air drills get their oil from the air supply.

Rock Breaking Basics
This will be covered in more detail in part 2. For now, let’s go with the premise that there are 3 primary methods we can use to break the rock we just drilled.
1. Feathers and Wedges: This is a traditional technique that still works great. It involves drilling a line of holes, setting steel “feathers” in each hole, then driving a wedge in to place tension on the rock. As the wedges are hammered down in sequence, cracks begin to form and then connect between the holes. These tools are still available from trail tool suppliers. 5/8” is the minimum size worth using.
2. Expanding Grout: Special grout products such as Rock-X and Dexpan can be mixed, poured into holes, and left to set and expand overnight. Within 24 hours, they achieve breakage, similar to the above, but on a larger scale. They work in hard or soft rock and will even break solid bedrock into manageable pieces that can be jack-hammered or dug out with bars.
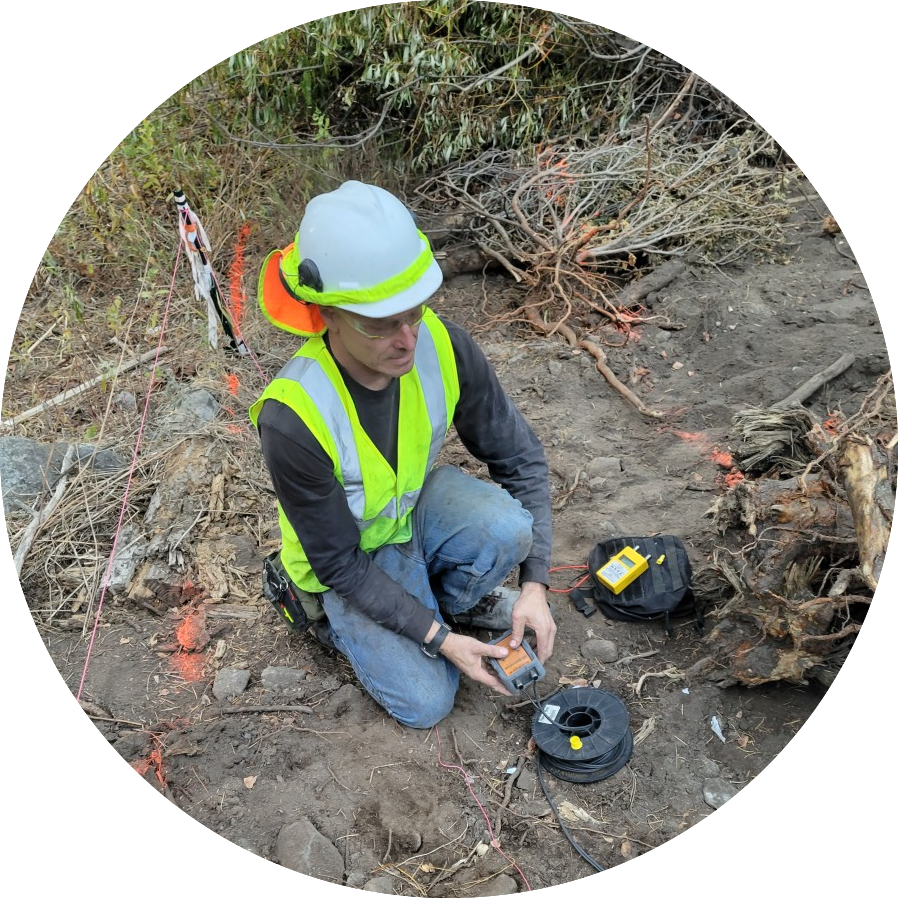
3. Explosives: Blasting isn’t just dynamite anymore. There is such a thing as “micro blasting” that can be done by anyone with simple training. The “Sierra Blaster” is one such system, and it is capable of breaking up boulders and other rock and only requires a 10mm hole for each blast head. No ATF license is required, although the manufacturer requires an online class before supplies can be purchased. These are precise enough that rescue teams have successfully used them in proximity to trapped people.
For bigger jobs, there are various types of high explosives, such as Kinepak, and also special pyrotechnic cartridges, such as the Royex system, that are a sort of in-between option.
In future articles, we will cover all of these in more detail. Until then, stay safe and lift with your legs.
Happy trails!
————————————
This article originally appeared in Volume 2, Issue 1 of Trail Builder Magazine.
John Norman
John Norman is a licensed blaster based in Southern California. He has worked on various projects for mining, conservation, and underground rescue, and has published numerous articles on rock breaking. Bringing together stonework techniques and high-tech equipment has been a particular focus. John also volunteers with the San Bernardino Sheriff’s Cave Rescue team and the Underground Conservancy. He loves breaking rock, especially when it involves the use of explosives. His company, ACCX Research, provides blaster training, licensing, and other support for backcountry blasters.
